
Object Detection Using YOLOv5 Tutorial
Welcome! I’ve written this overview of my computer vision project to detect the school bus passing my house. This is for the person who wants to start playing with computer vision and wants to see a project from end-to-end. In this article I’ll start with explaining the problem I’m trying to solve, mention the camera I chose, show a quick opencv tutorial, create images and discuss the different python packages I'm using. The github repo to the project is here. This project will be covered as series of a couple blog posts to get through explaining the rest of the project, so be on the lookout for the next article! The next article will be a guest blog on Roboflow and I'll be sure to link it here.
In this article we’ll cover:
What I’m solving
The libraries I’m using
Setting up the camera
Creating images
Data collection process
The problem:
I wanted to set up a camera and use a computer vision model to detect the school bus when it is passing our house and alert me by sending a text message once the bus is detected. The school bus passes by our house, picks up someone else, and then turns around and then stops at the end of our driveway. This gives us a couple minutes to get my kids ready and out the door once alerted. And now I don’t have to wonder whether or not we’ve missed the bus go by.
The Libraries:
For this project I'm using a number of libraries. Here's a high-level overview of what we'll be working with throughout the project:
yolov5 - This is the object detection model where we will custom train a yolov5 model on our own data. From their repo readme: "YOLOv5 is a family of object detection architectures and models pretrained on the COCO dataset, and represents Ultralytics open-source research into future vision AI methods, incorporating lessons learned and best practices evolved over thousands of hours of research and development."
Roboflow - Loved this GUI for annotating and augmenting the image data that is then be used to train our yolov5 model. Roboflow is an end-to-end CV platform and a library which also provides a Python SDK.
CometML – Comet allows you to basically take a snapshot of your code, dependencies, and anything else needed for your work to be reproducible. With one function you can compare all of your training runs very easily, it’ll even push your runs up to Github for you.
opencv - We're using opencv to access the camera.
Before we get started, if you’ve tried Coursera or other MOOCs to learn python and you’re still looking for the course that’ll take you much further, like working in VS Code, setting up your environment, and learning through realistic projects.. this is the course I used: Python Course.
Setting up the camera:
I wanted to share about the actual camera I used because finding an appropriate camera wasn’t overly intuitive. I knew that I'd need a friendly api that would work with opencv in python and there was a bit of research before I felt confident the camera would work for my purposes. I went with the ANNKE C500 5MP PoE IP Turret Security Camera it was $60.
opencv can connect to an RTSP compliant security camera (RTSP stands for Real Time Streaming Protocol.. Real time is what we want, baby!). Once we have that setup, we’ll start thinking about collecting our data and then annotating that data using Roboflow.
The instructions for setting up this particular camera were pretty straightforward, I just followed the camera's "getting started" instructions.

Then enter your RTSP address from the camera as your network URL.

Keep that URL handy, you’ll be using that in a couple of places during this project.
The very first step I took once having my camera setup was just to look at the example code in the opencv documentation (cv2) to make sure that things were running. So basically we're going to use VLC to see ourselves on camera and just check that it's all actually working. This is taken directly from the opencv documentation and I only changed the first line of code so that it would use my RTSP URL. I don't have the following code in the repo because it's really just testing and not part of the project.
import numpy as np
import cv2 as cv
cap = cv.VideoCapture("my RTSP URL")
if not cap.isOpened():
    print("Cannot open camera")
    exit()
while True:
    # Capture frame-by-frame
    ret, frame = cap.read()
    # if frame is read correctly ret is True
    if not ret:
        print("Can't receive frame (stream end?). Exiting ...")
        break
    # Our operations on the frame come here
    gray = cv.cvtColor(frame, cv.COLOR_BGR2GRAY)
    # Display the resulting frame
    cv.imshow('frame', gray)
    if cv.waitKey(1) == ord('q'):
        break
# When everything done, release the capture
cap.release()
cv.destroyAllWindows()
After I got to see myself on camera, the next thing I did was set up handling the credentials. This was just to keep my credentials out of version control by saving them in the .camera_credentials file which is excluded from version control with .gitignore. This script takes my credentials and creates the RTSP URL from them. When you call 'detect' in yolov5, the way you do that is by giving it the RTSP URL, so I define a function here called get_rtsp_url().
from os.path import exists
import cv2


def get_rtsp_url():

    # we get the IP address of the camera from our router software
    camera_address = "192.168.4.81"

    # This path and port is documented in our security camera's user manual
    rtsp_path = "/H264/ch1/main/av_stream"
    rtsp_port = 554

    # The name of a file which we will exclude from version control, and save our username and password in it.
    creds_file = '.camera_credentials'

    if not exists(creds_file):
        raise f'Missing configuration file: {creds_file}'

    # This variable will hold the username and password used to connect to
    # the security camera.  Will look like: "username:password"
    camera_auth = open(creds_file, 'r').read().strip()  # open() is how you can read/write files

    # return the open cv object with the authenticated RTSP address.
    full_url = f'rtsp://{camera_auth}@{camera_address}:{rtsp_port}{rtsp_path}'
    return full_url
Next is the connecting_to_camera.py. In a while loop, we're asking for the next frame from the camera and then we save it to the images directory. I also have this create a new directory for each day and for each hour. This made it easier to find and keep track of images easier for me. This is adapted from the opencv documentation.
import numpy as np
import cv2 as cv
from camera import connect_camera
from datetime import datetime
import time
from pathlib import Path
import os

cap = connect_camera()
if not cap.isOpened():
    exit()

img_dir = Path('./school_bus_images/')

while True:
    ret, frame = cap.read()
    if not ret:
        print("Can't receive frame (stream end?). Exiting ...")
        break
    ###  resizing so it won't be so huge
    frame = cv.resize(frame, (int(frame.shape[1] * .5), int(frame.shape[0] * .5)))
    now = datetime.now()

    filename = now.strftime("%m-%d-%Y_%H-%M-%S-%f") + ".jpg"
    day = now.strftime("%m-%d-%Y")
    hour = now.strftime("%H")
    filepath = img_dir / day / hour / filename
    if not (img_dir / day).exists():
        os.mkdir(img_dir / day)
    if not (img_dir / day / hour).exists():
        os.mkdir(img_dir / day / hour)

    cv.imwrite(str(filepath), frame)
    #cv.imshow('frame', frame)
    time.sleep(0.1)


# When everything done, release the capture
cap.release()
cv.destroyAllWindows()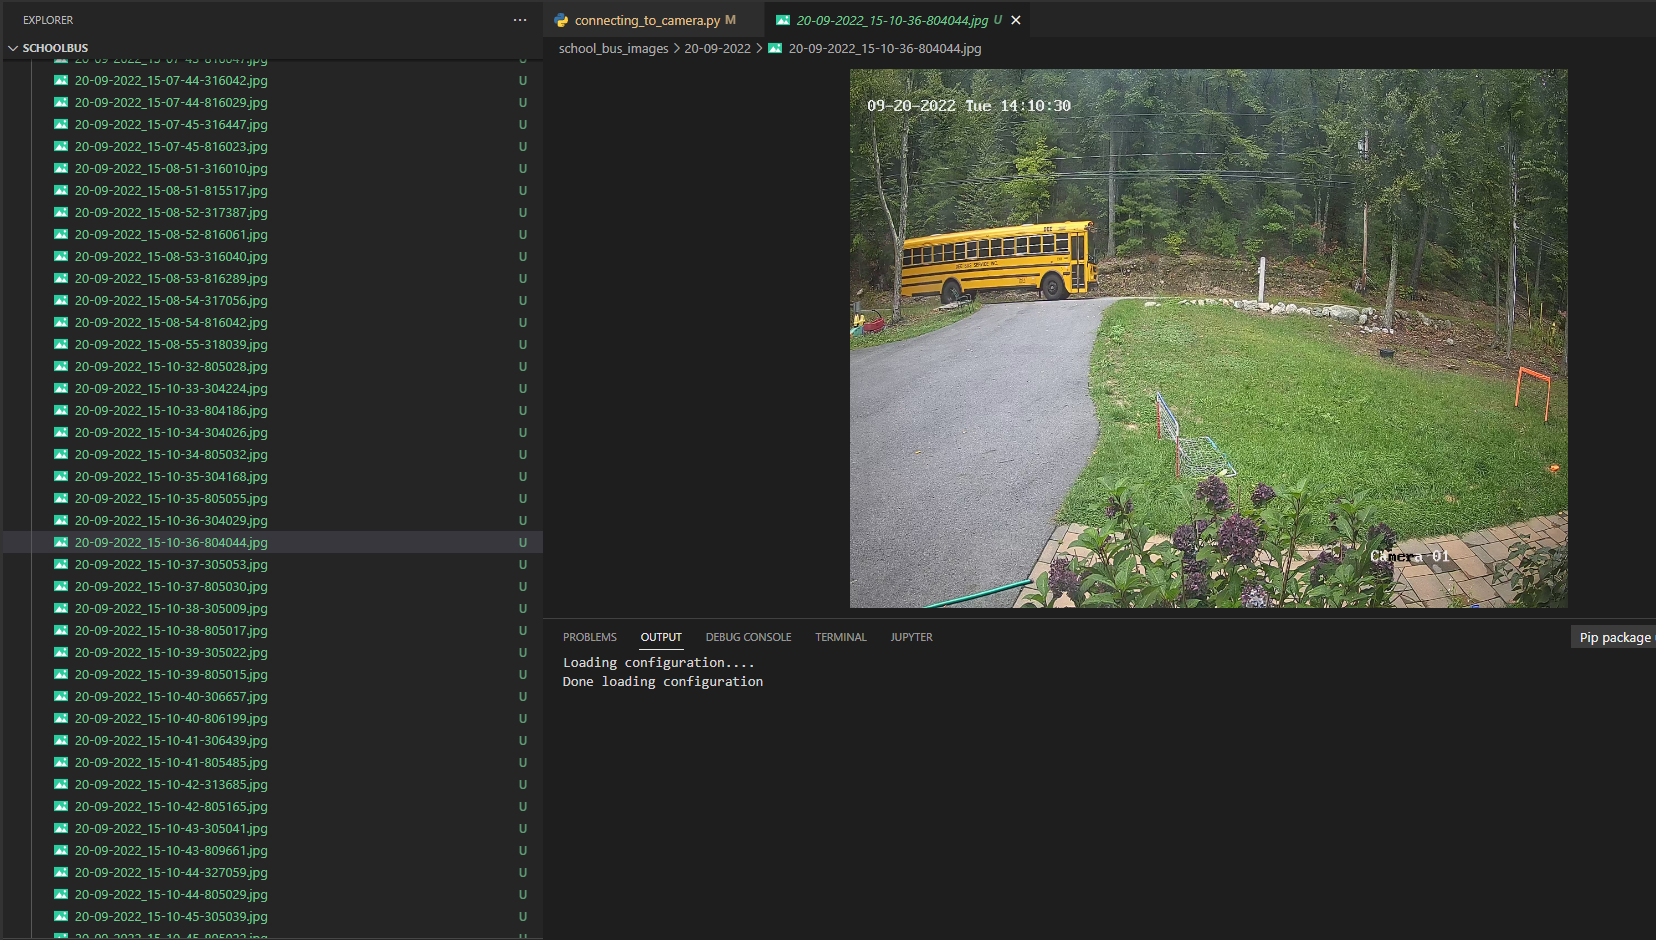
Data Collection:
These images will work great because they're of the actual scenery and object I'm looking to detect. Originally I had taken a video of the school bus pass my house on my phone. I then used a short script in R to turn that video into images. Live and learn, the frames from the actual camera are much more effective. There were many other things I learned during the data collection process as well. This is really my first time working with image data. I had tried using photos of buses from the internet, but this introduced orientations, colors and other things that I didn't need. My front yard will always look the same (with the exception of snow and being darker in the winter), so the buses from the internet didn't make sense for the project. If I was to extend this project to other use cases I absolutely might think about leveraging images from the internet or using more data augmentation. I made sure to include plenty of partial busses and images of the bus going both directions past my house.
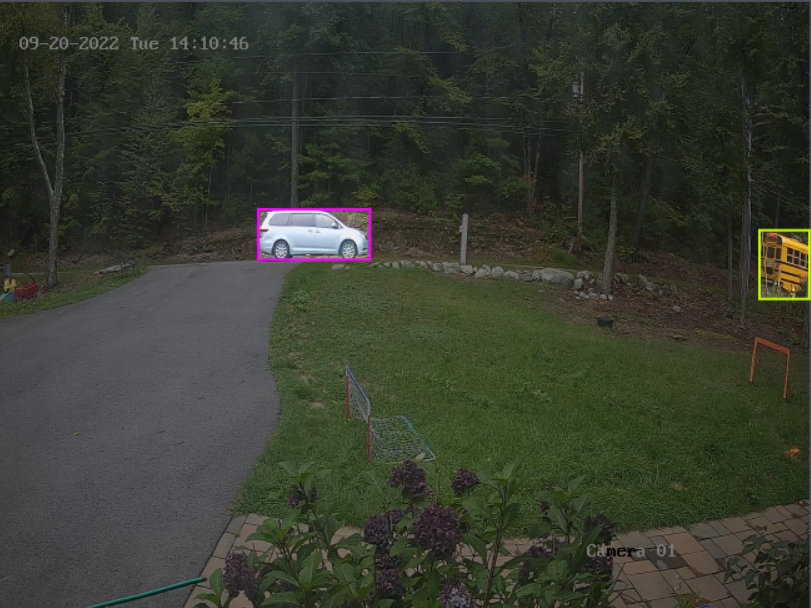
The model also detects cars and people quite well, but it was only trained on data that happened to be in front of my camera. I also annotated some bicycles, but that class isn't working well in my model at all.
I wish I had thought about how I planned on organizing my images from the beginning. Between using video from my phone, to leveraging images from the internet, different file formats being required for different algorithms (I started with yolov3 and then tried a classification algorithm before going with yolov5, they all required different file format and structure), I ended up with a lot of different data folders that I did not manage well. Then when I put the project down for the summer because school was out, when I came back in the fall I was really confused as to where my most recent images were. This is when I decided I was going to set up a Comet artifact to help manage my data, but we'll talk more about that in a future article.
Wonderful! We've talked about my considerations when getting images and hopefully your camera is now up and running. The next step is to annotate the images. I personally set up a free account in Roboflow, the UI was super intuitive (as you can see below) and I was able to annotate my images very quickly. You just click on the big "+ Create New Project" button, give the project a name and select "object detection" from the "Product Type" menu, on the next page select "upload" from the left nav and then you can upload your images.

Summary:
In this article we set ourselves up to begin a computer vision project. Although I’d love to keep this article going, I’m going to be breaking this project up into digestible chunks. We looked at the different libraries we’ll be using throughout the project, set up our camera, created images, and got ourselves set up to annotate all of those images. Next, we'll be talking about getting the data out of Roboflow, creating a data artifact in Comet, and training a yolov5 model. Since I'm chatting about Roboflow, the next article is actually going to be a guest blog on the Roboflow site. I'll make sure that all the articles are easy to navigate and find. After that we’ll choose the best model from the training runs by looking at the different experiments in Comet and use this to detect the bus live while watching the output live. Finally, we’ll be configuring how to send out text alerts using AWS. Lots of fun pieces in this project. It sounds like a lot, but I hope this feels like a project you’ll be able to do on your own! Stay tuned for the rest of the series. Click here to read the next article in the series.